How to assemble a PC: The Heatsink
Although often ignored, the heatsink function is very important within a computer. It not only keeps our processor cool, ensuring better performance, but allows us to have a better airflow and airflow inside our homes.
Let’s start immediately by defining what is a heat sink. This is a metal device to be mounted on the CPU that allows for better temperatures and greater longevity.
If you still do not understand the concept, just know that there are different types and different forms, each of which adapts a precise technology. There are various types of heatsink :
- Passive : it is a simple metal piece (copper usually) very high and recess that dissipates the heat accumulating it through its protuberances. It is not a very efficient method of dissipation, but it is the most suitable solution for a low budget and for components that are not very powerful (to give an example: we certainly cannot dissipate an i7 8700k with this type of sink).
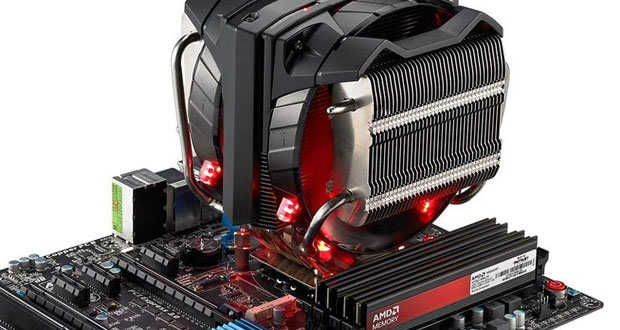
- Air : the ” simple metal piece ” assumes a shape very close to that of a radiator, at whose ends are mounted one or more fans that extract the stored heat and cool the environment.
- A liquid : in this case, the form factor becomes more complex: Together with the real radiator, on which the fans are installed, there is a ” waterblock “, to be installed on the CPU that will cool it through the liquid inside it. It will store heat and carry it through pipes to the radiator which, under the effect of the fans, will cool the liquid. In this case, we distinguish prefabricated AIO liquid coolers (All In One) and liquid coolers, which are assembled piece by piece.
Dimensions, adapted technology and materials obviously depend on the destination and price. We use liquid coolers for builds of a certain level, which allow ” overclocking “, while air sinks build in the average.
Because of the existence of various Intel and AMD platforms (1151, AM4, and so on), the sinks also have different adapters, so before choosing one, always check if it supports the architecture of your processor!
Table of Contents
How to install a heatsink
How to install the heatsink? Very simple. First, we make sure we have the CPU surface completely clean (if it is the first assembly skip this step), otherwise we remove the previous thermal paste through special alcohol like this.
After that, we install the dissipation system in the case and the waterblock on the CPU after applying a thermal paste in the center. It may be necessary to add a backplate or screws around the socket, so we recommend that you follow the instructions in your heatsink manual.
To connect the dissipation system to the power supply, insert the 3 or 4 pin socket in the ” CPU FAN ” and ” CPU POWER ” space.
Now let’s analyze, which are the best heatsink by price range.
Best low-end heatsink
ARCTIC Freezer 7 Pro
The Arctic Freezer 7 Pro is one of the best low cost heat sinks on the market. It supports a multitude of architectures, including FM2, FM1, AM3, AM3, AM2, AM2, 939, 754 (AMD) and 1366, 1150, 1151, 1156, 1155, 775 (Intel).
It has a 92 mm fan that allows a decent heat dissipation, and we already find the MX-2 thermal paste, always in Arctic’s home. The dimensions, of just 13.2 x 10 x 14.5 cm, it is possible to insert it in small houses.
Cooler Master Hyper 212
The Cooler Master Hyper 212 is the direct response to the Freezer 7 Pro, dimensions, sockets and price are very close to each other. We speak here of 11.9 x 7.6 x 16 cm, equipped with a 120 mm fan equipped with red LED lighting. It already has a pre-applied thermal paste, and allows superior performance to those of the Intel home stock dissipators.
Best mid-range heatsink
Cooler Master MasterLiquid Lite 120
The MasterLiquid Lite 120 gives you access to the world of liquid dissipation at very low prices. With some compromise. The radiator provides a good fan to dissipate the heat. The copper waterblock is very easy to apply, but pay attention to the pipes, they are not very long!
In addition, performance improvements are minimal or non-existent compared to air coolers in the same price range. Also in this case the equipment is very rich, even if you speak of an entry level. Nice white LED present in the waterblock, which illuminates the ” Cooler Master ” logo.
Noctua NH-U12S
We treat the sink Noctua par excellence. It is a great block, in height and thickness, which allows excellent performance at an affordable cost. Includes a backplate, supports various architectures, such as FM2, FM1, AM3, AM3+, AM2+, AM2 (AMD) and 1366, 1150, 1151, 1156, 1155, 775 (Intel). 5 x 95 x 125 mm the dimensions, is already equipped with two 120 mm fans and a tube of excellent Noctua thermal paste to be applied manually.
The only flaw? Fans with a very difficult color to match in a build. Resolvable problem using others.
Best high-end heatsink
Cooler Master V8
The Cooler Master V8 is one of the best air coolers on the market. The second version, which we are taking into consideration, not only guarantees high-level performance, but is also very beautiful aesthetically, thanks to the various LED lights and aggressive style.
Supported sockets include AM2, AM2+, AM3, AM3+, LGA 1366, FM1, FM2, FM2+, LGA 1156, LGA 1155, LGA 1150, LGA 1151, LGA 2011, LGA 2011-v3, LGA 775. Of this, sink are impressive, 15.4 x 15 x 16.7 cm and weighs well over a 1 kg. The two 140 mm fans guarantee excellent performance, but they are very noisy.
CORSAIR HYDRO SERIES H100i V2
We now arrive at one of the most accessible liquid dissipation systems. The Corsair Hydro H100i has a 240 mm radiator on which two 120 mm fans are mounted. The waterblock features a logo illuminated by RGB LEDs.
The dimensions are from 27.6 x 3 x 12.5 cm. It supports AM2, AM3, FM1, FM2, LGA 2011-v3 and a few others, but you can purchase other adapters on the Corsair website.
Product prices and availability are subject to change. Any price and availablility information displayed on Amazon at the time of purchase will apply to the purchase of any products.